
Printing and Assembly Instructions
Perfect Petals™ DIY Fan Program Kit and Template
are trademarks of Cherish Paperie, LLC, © 2009. All rights reserved
These
fans are completely DIY and are shipped flat for you to print and
assemble. No eyelets or bindings are included with this fan. We provide
a Word template and general instructions to help set up the printing on
the fans, but options for printing vary from printer to printer.
be creative!
DIY Fan Programs Printing Instructions
Instructions for printing:
Please print these tips to
get started. Or download and print the PDF version.
Step 1: Download and Type
download your template Microsoft Word 97-2003 Document (.doc) or Microsoft Word 2007 Document (.docx) OR for the more design and tech savvy users, you can create your own document in Illustrator, Publisher template or Publisher 2000, InDesign or your favorite program, using our JPG image or EPS file of the template.
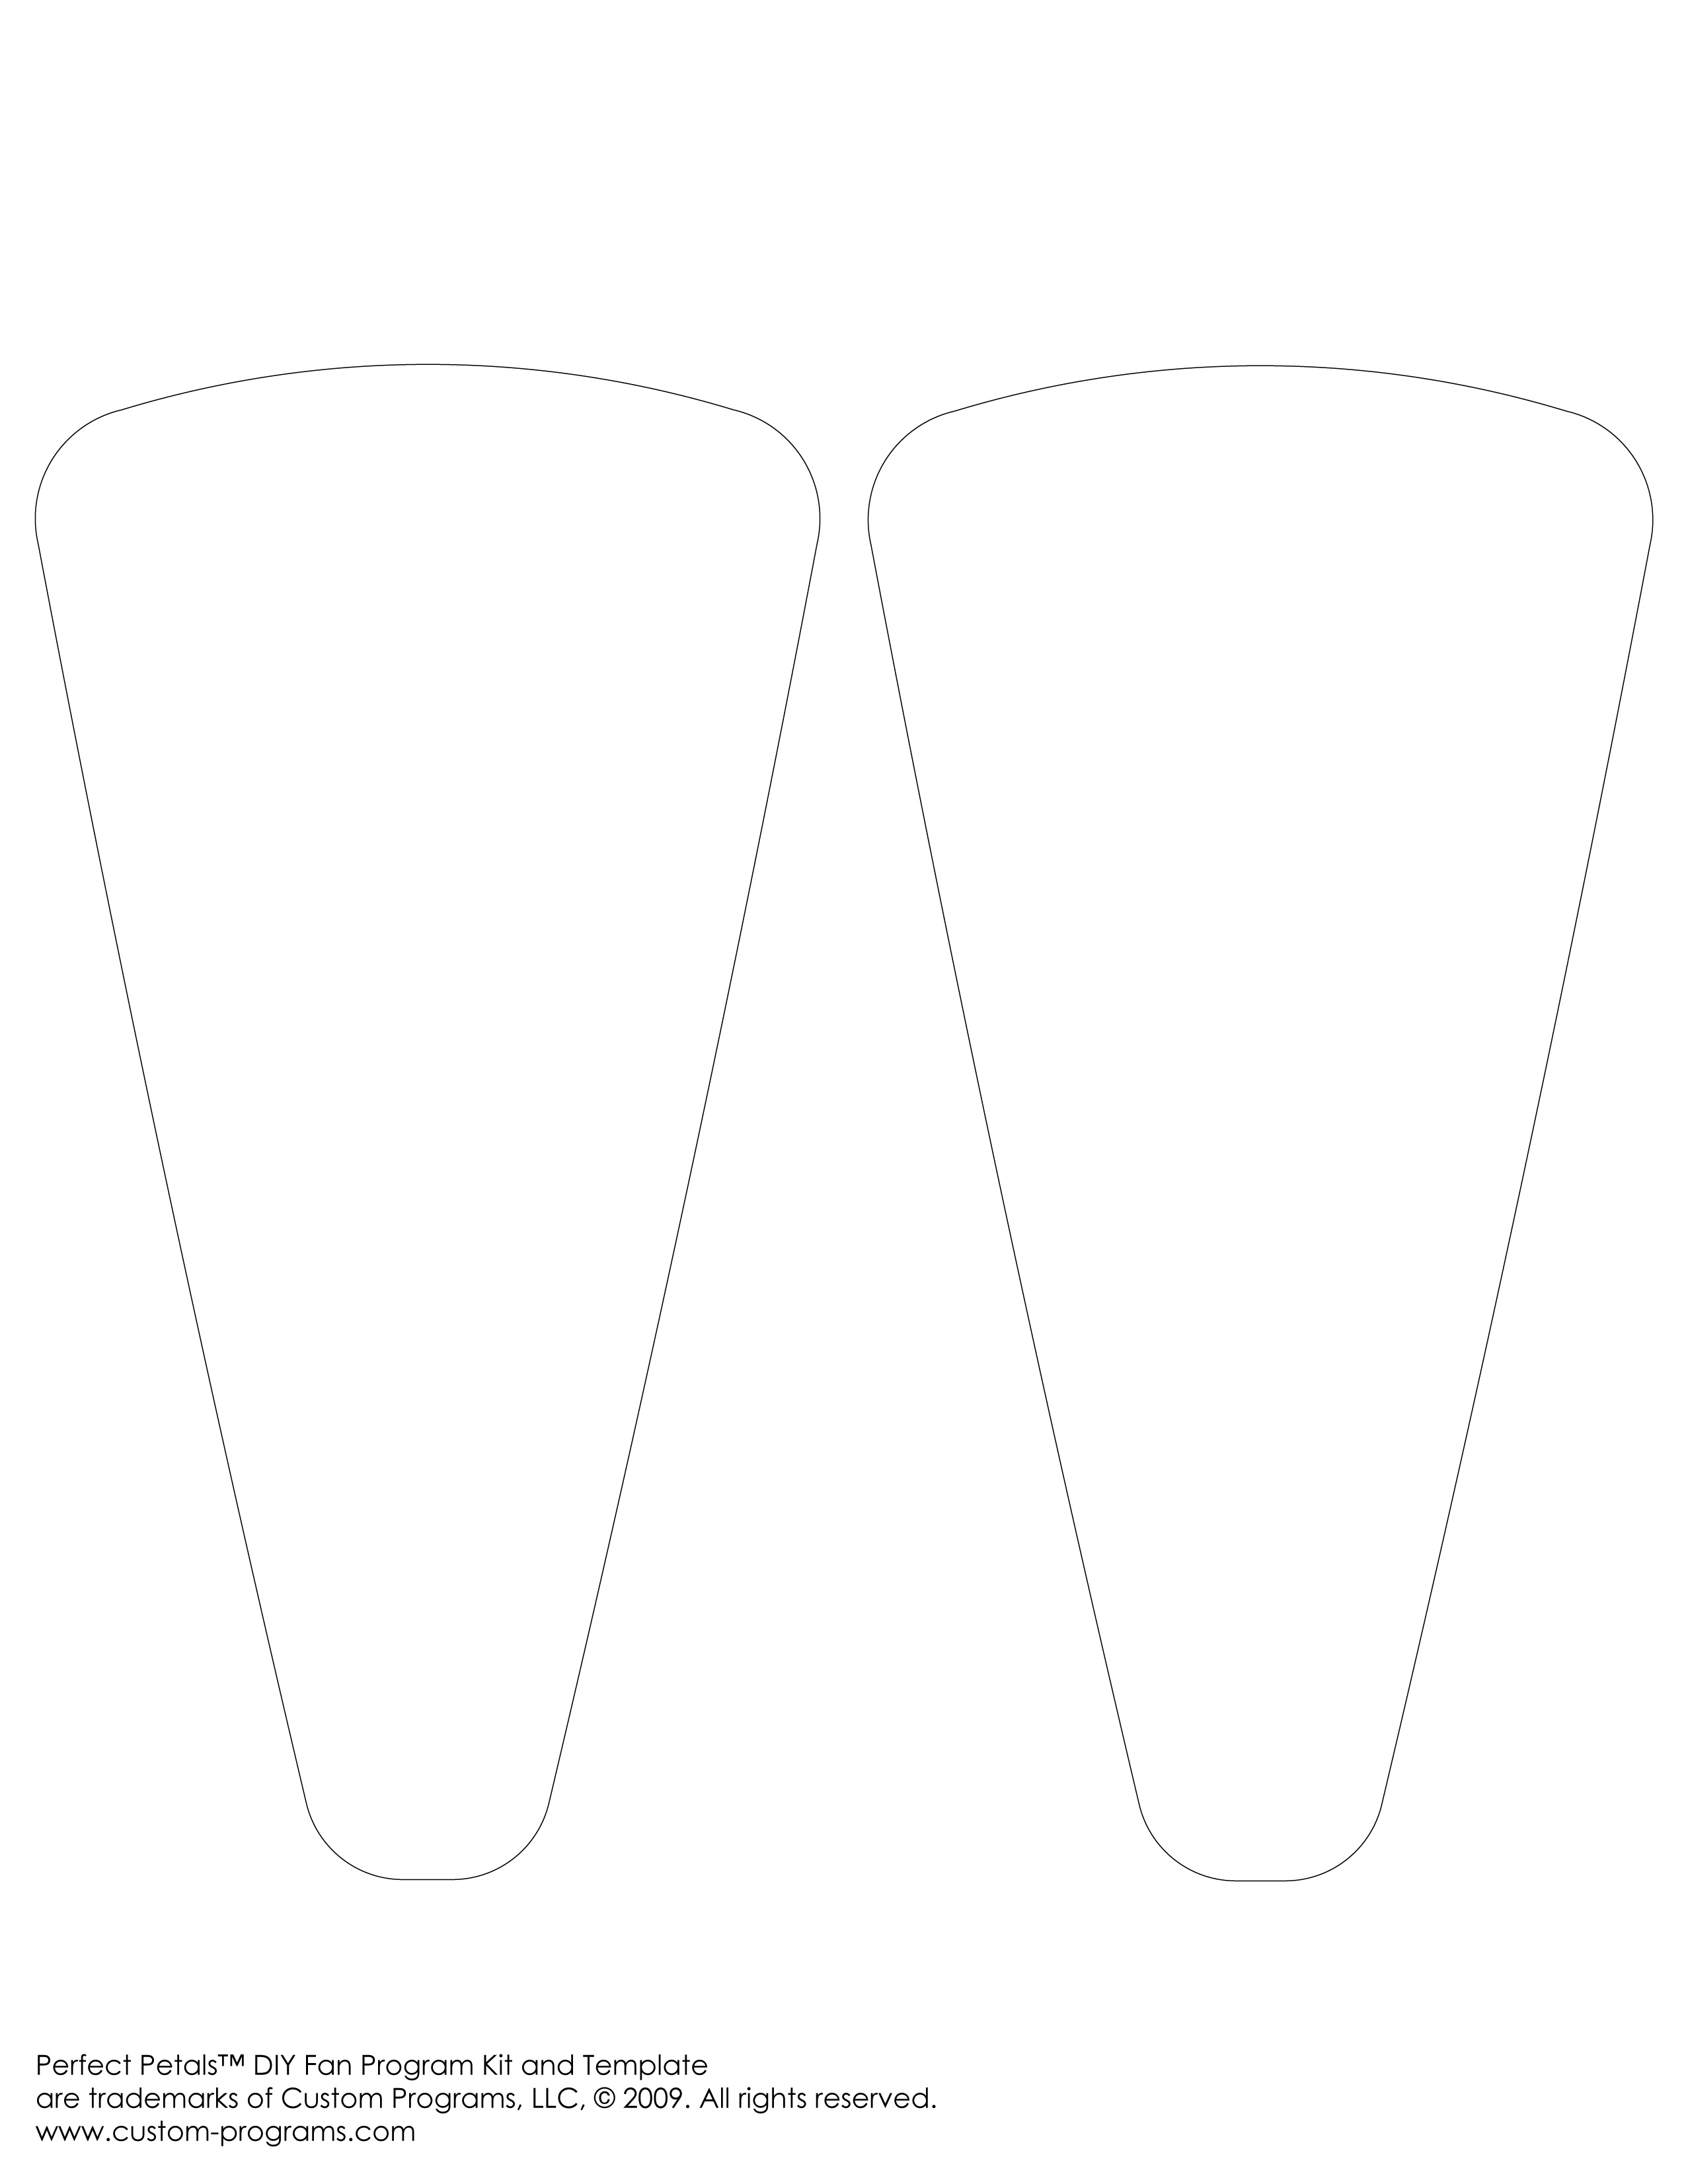
Use Save as....to save to your hard drive. Open your template and begin! (it is a good idea to use Save as...to save it as a new name "myprogram_diyfantemplate.doc" to a file in"my documents" or your desktop so you can find it easily if you need to come back to it later.)
• Replace sample text in the template by highlighting the sample text, and typing over it. You can then format the font style, size, and/or color with the Directions below.
• For additional design and wording ideas, visit our sample gallery.
Step 2: formatting your project
Make sure to type your personalized text first!
• To change font style and size, please highlight the text you wish to change, and then click on format in the top toolbar, and select font from the drop down Menu to open the font options box. (For word 2007, the font formatting options can be accessed by right-clicking after highlighting the text, and choosing font
From the pop-up menu or from the home tab.)
Step 3: Saving your project:
• To save your project, click on file in the top toolbar, and select “save as…” from The drop-down menu. (For word 2007 users, click on the “office” icon at the top left corner, and select save as<< word document). A “save as” dialog box will hen open; in this box you can set the location where this document will save (i.E.
“My documents,” “desktop,” a disk drive, etc) and create a title for your document.
Make sure that the “save as type” field says “word document” or “microsoft word Document.” Click on save to finish. Once you do this, you will have a copy of the template saved to your computer, which you can return to at anytime. To retrieve this, launch microsoft word, and click on file<< open to browse for your saved
Project.
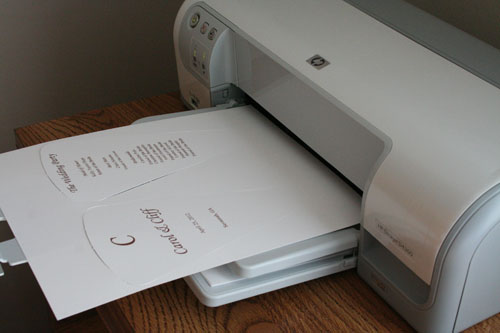
Step 4: Adjust Printer Settings
before printing, check and adjust the following printer settings: (To access these settings: click on file<< print to open the “print dialog box.” In this box, click on the properties or preferences button. A new box will open up which will contain the various setting options within your printer. Search in these tabs for the
Settings described below.)
Step 5: Print!
When printing you may get a pop-up window that says the printer margins are too small...just click OK. That is it!
Tips for successful printing
• Paper size: in the paper-size drop-down box, select custom size, if available, and set the paper size to "Letter”
• Orientation: Portrait
• If available, select Rotate 180 degrees to have your fan sheet feed
from the bottom or tapered end instead as this will minimize any paper
jams - (Note: not all printers have this feature. Test print prior to
selecting the “rotate” setting.)
• Paper/media type: this is typically defaulted to ‘plain letter
paper.’ Set your printer’s paper type to cardstock or heavyweight.
• Print quality: change this setting to best.
Other printing notes:
• Test printing
It is always a good idea to test print on plain paper (or our sample kit)
cut to the size of your project before using the actual stock for your
project. Test printing allows you to check the alignment and look of
your project, and gives you the opportunity to confirm the way in which
the stock will be loaded into the printer (face up, face down, etc.).
• Manually feed the paper into the printer it is recommended that you
manually feed the paper, rather than placing a stack of
Paper on the printer’s tray. This will minimize the chance of a paper
jam. (You can send the whole job at once, but remove all paper from the
printer before sending. You will then be able to put each sheet in one
at a time).
• Adjusting the margins: Additionally, if you are still having problems
getting the correct alignment after checking these tips, you can adjust
the top margin of the template if the text is printing
Too high or too low. To do this, you would open the template and click
file>> Page setup. Then in the margins tab, either increase or
decrease the top margin according to how high or low the text is
printing.
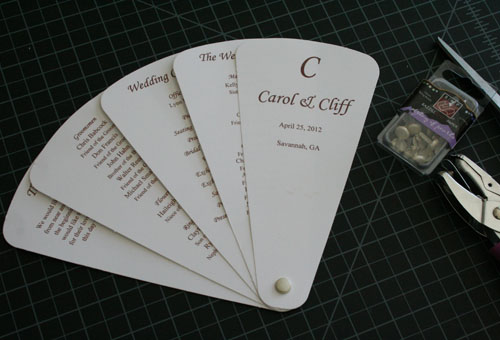
Materials and Tools Recommended:
DIY fan program kit, hole punch, scissors, brads or eyelets and
eyelet-setting tools - Crop-A-Dile (eyelet setter), computer,
printer.
Your local scrapbook store will have a variety of different colored brads, eyelets and other fun items for inspiring your design!
DIY Fan Programs
Assembly Instructions
Print these instructions, and use them to help you assemble your project.
Step 1: Print your project
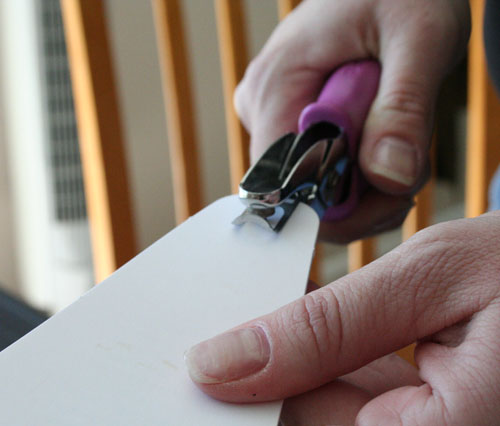
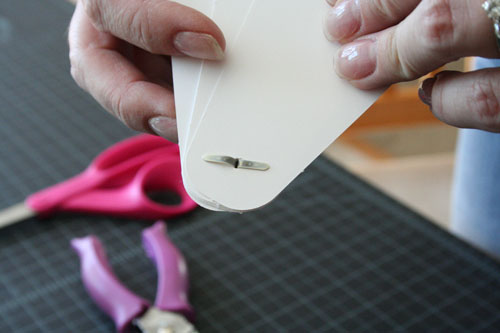
Step 2: Punch out
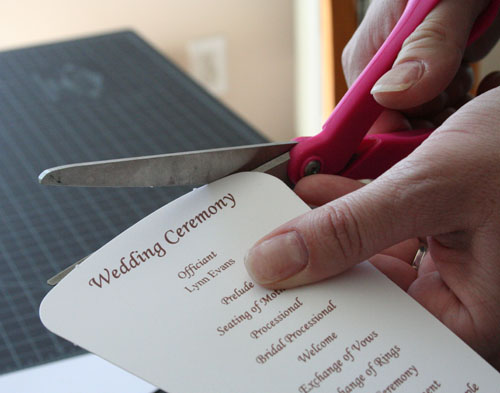
Carefully remove from the printed card from the perforated sheet.
Tip: our "kiss-cut" perfs may leave a small nub that will need to be
trimmed up with a scissors by hand if desired.
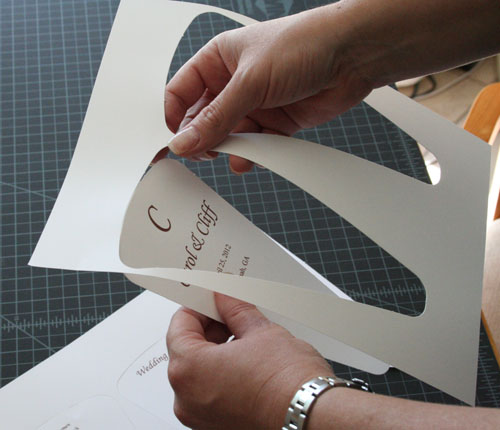
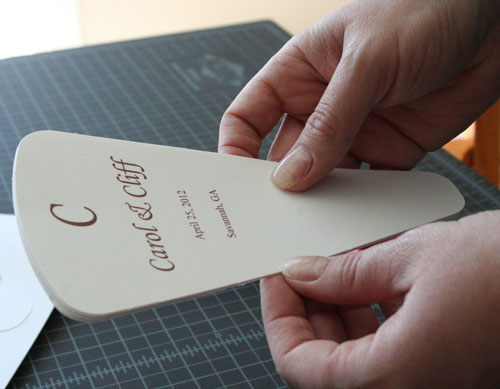
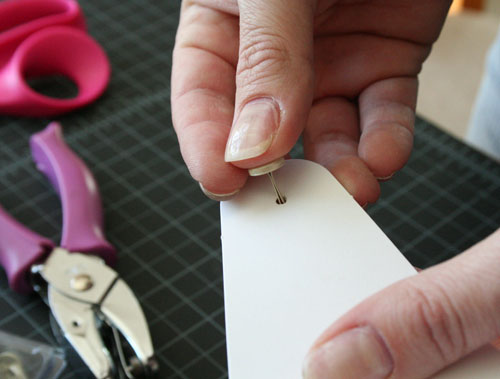
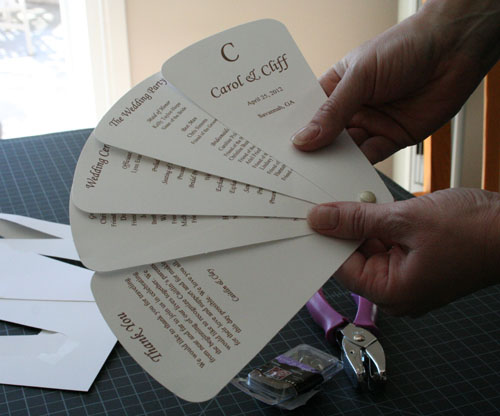
layer the different petals in the order you want, and punch a hole in the bottom of each set.
Step 4: Bind
Use and eyelet, brad, button, ribbon or whatever you desire to bind the set of pages together!
Step 5: Enjoy!
Perfect Petals™ DIY Fan Program Kit and Template
are trademarks of Cherish Paperie, LLC, © 2009. All rights reserved
Perfect Petals™ DIY Fan Program Kit and Template are trademarks of Cherish Paperie, LLC, © 2009. All rights reserved